One of the main advantages of Ringotel Shell is the ability to get your team members mobile and connected to their PBX extensions in a matter of minutes.
As an administrator, when you create users in the admin portal, they are automatically pulled into the contacts list of each Ringotel app user. Thus, team members can see the real-time presence of each colleague and call or message them in a few taps. This is convenient because your team members don’t need to create each contact manually or remember extension numbers of their colleagues to reach them.
But what if not everyone in your organization might need or want to handle their communications via Ringotel apps? To provide the same advantage of the centralized contact list, but not to be overcharged for users who are not using Ringotel apps, you can create two types of users - activated and unactivated.
Definitions
Activated
Regular users that could register with the Ringotel apps and use all the calling and messaging features available in the subscription plan.
Each billing cycle, we charge your account according to the number of activated users.
Unactivated
They can’t use Ringotel apps, therefore, we don’t charge for unactivated users.
Their purpose is to make it easier for your team members to communicate with colleagues even if they are not using Ringotel Shell.
How does it work?
Both activated and unactivated users are created in a similar way. As an administrator, you can either create each user manually or import all together from a CSV file.
To create a new user:
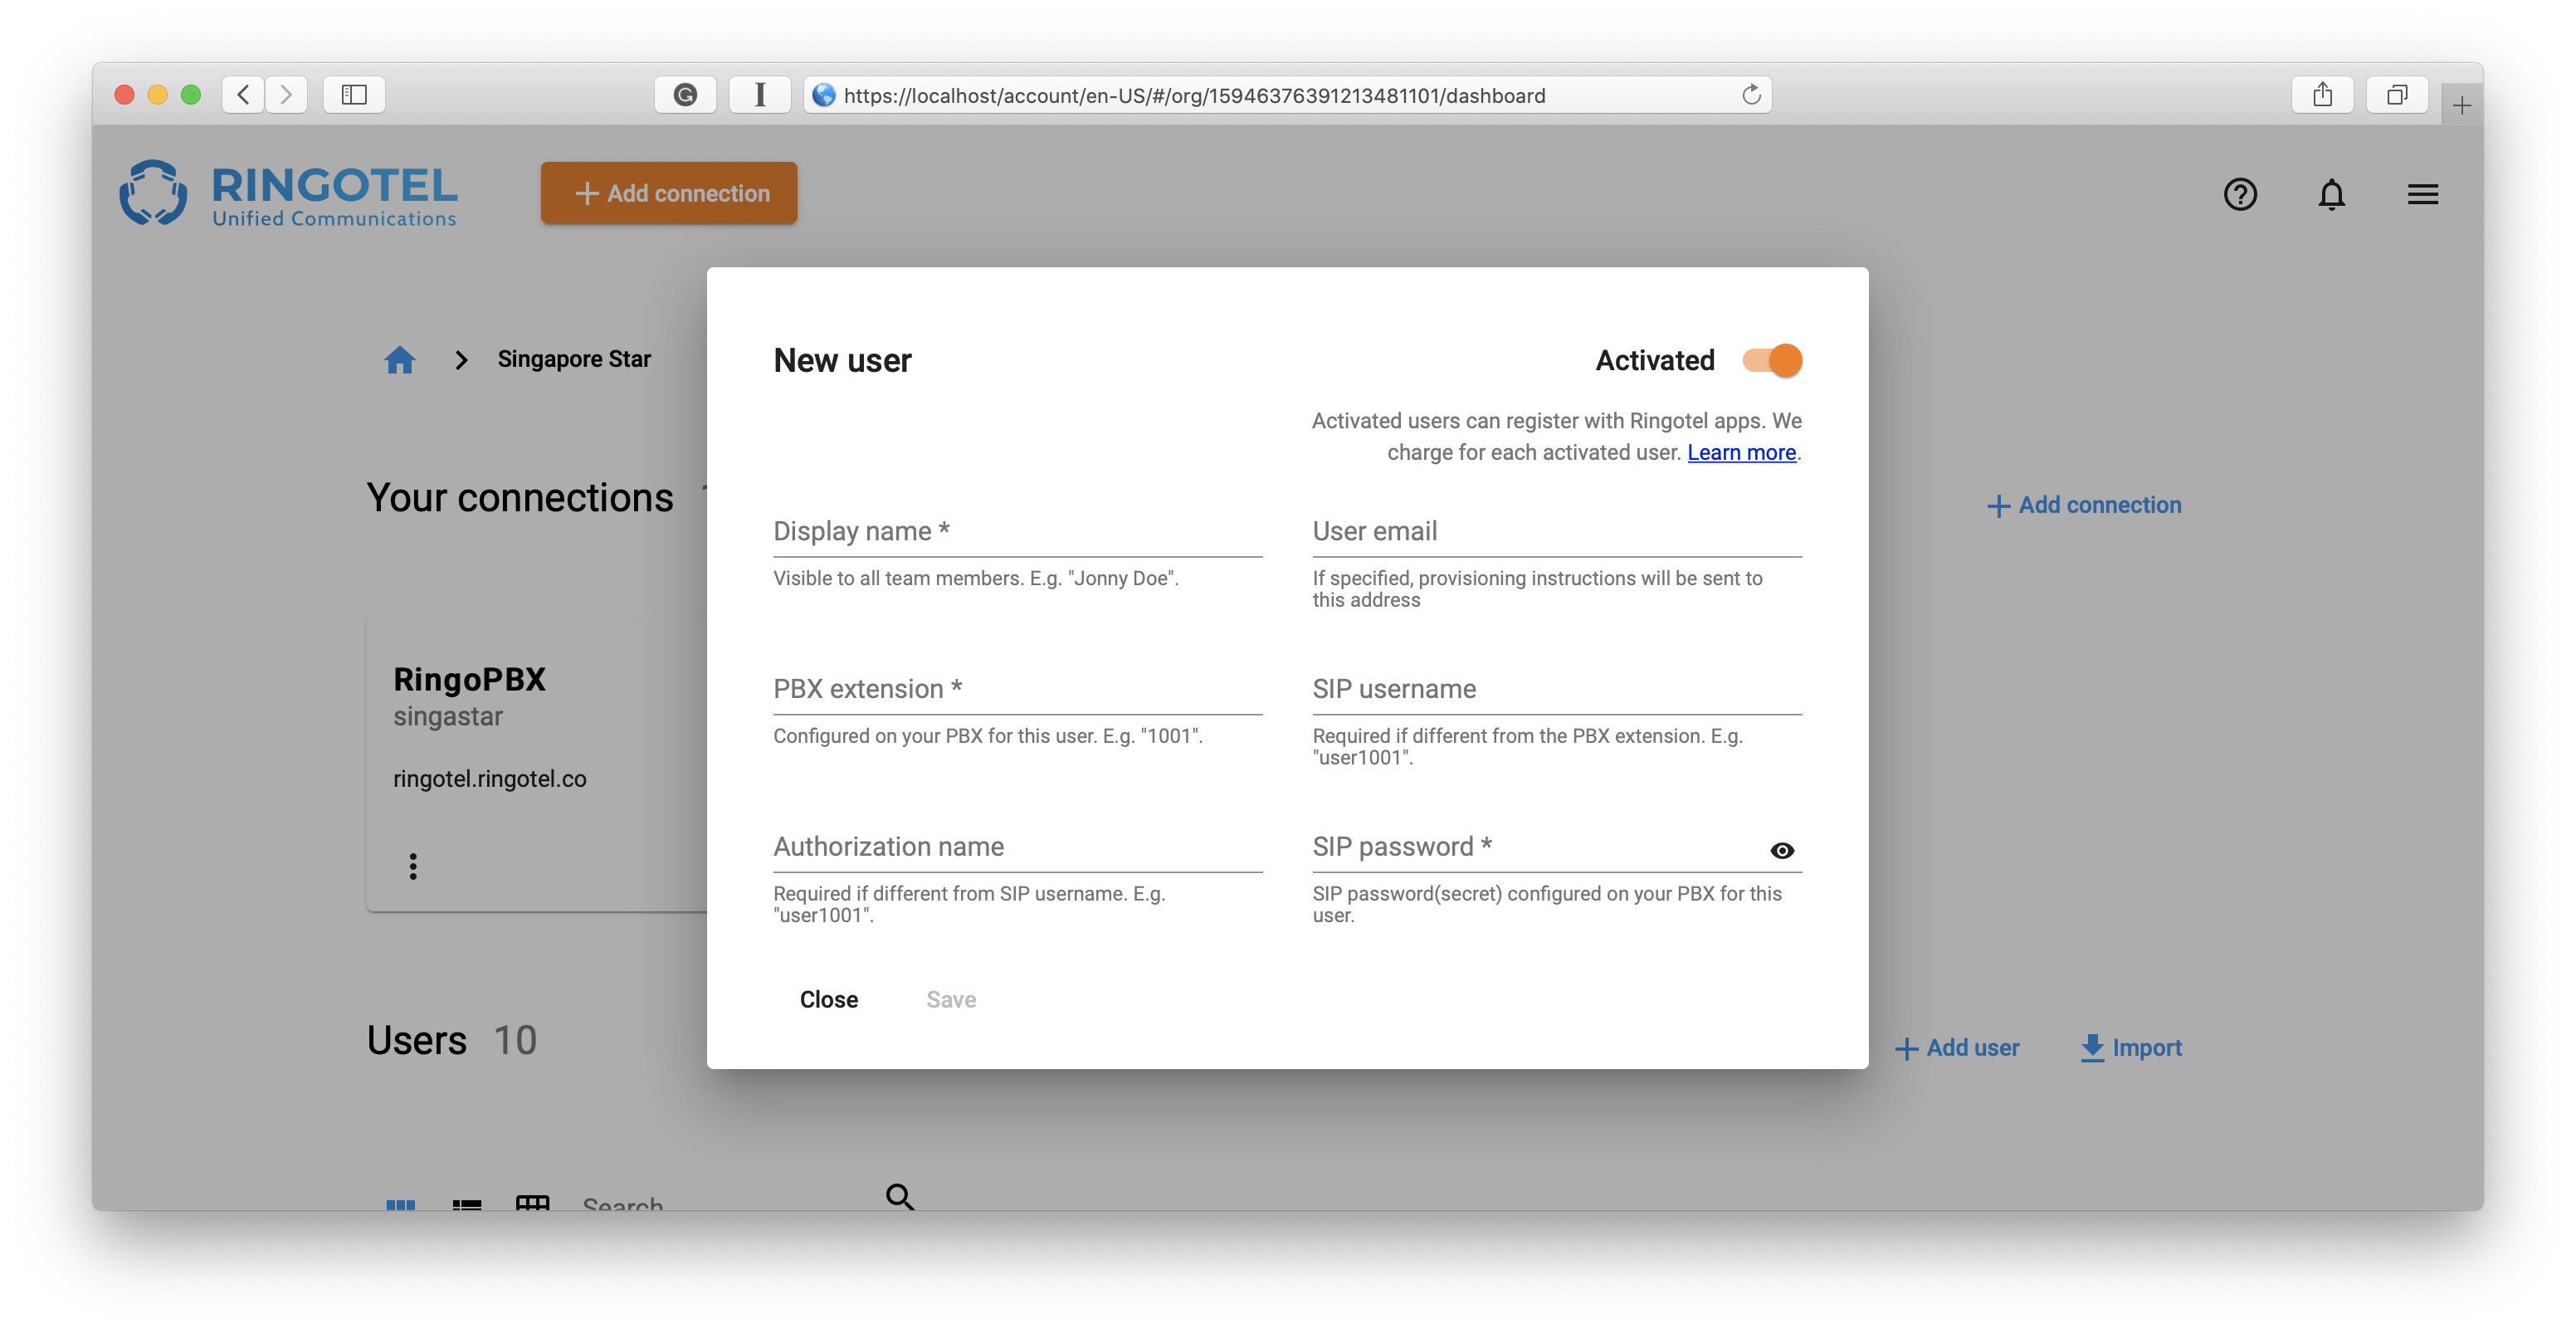
Go the organization or branch dashboard and click + Add user.
To create an activated user make sure that the Activated slider is turned on. To create an unactivated user, turn off the Activated slider.
Fill in all required field as described in How to add a new user.
To import users:
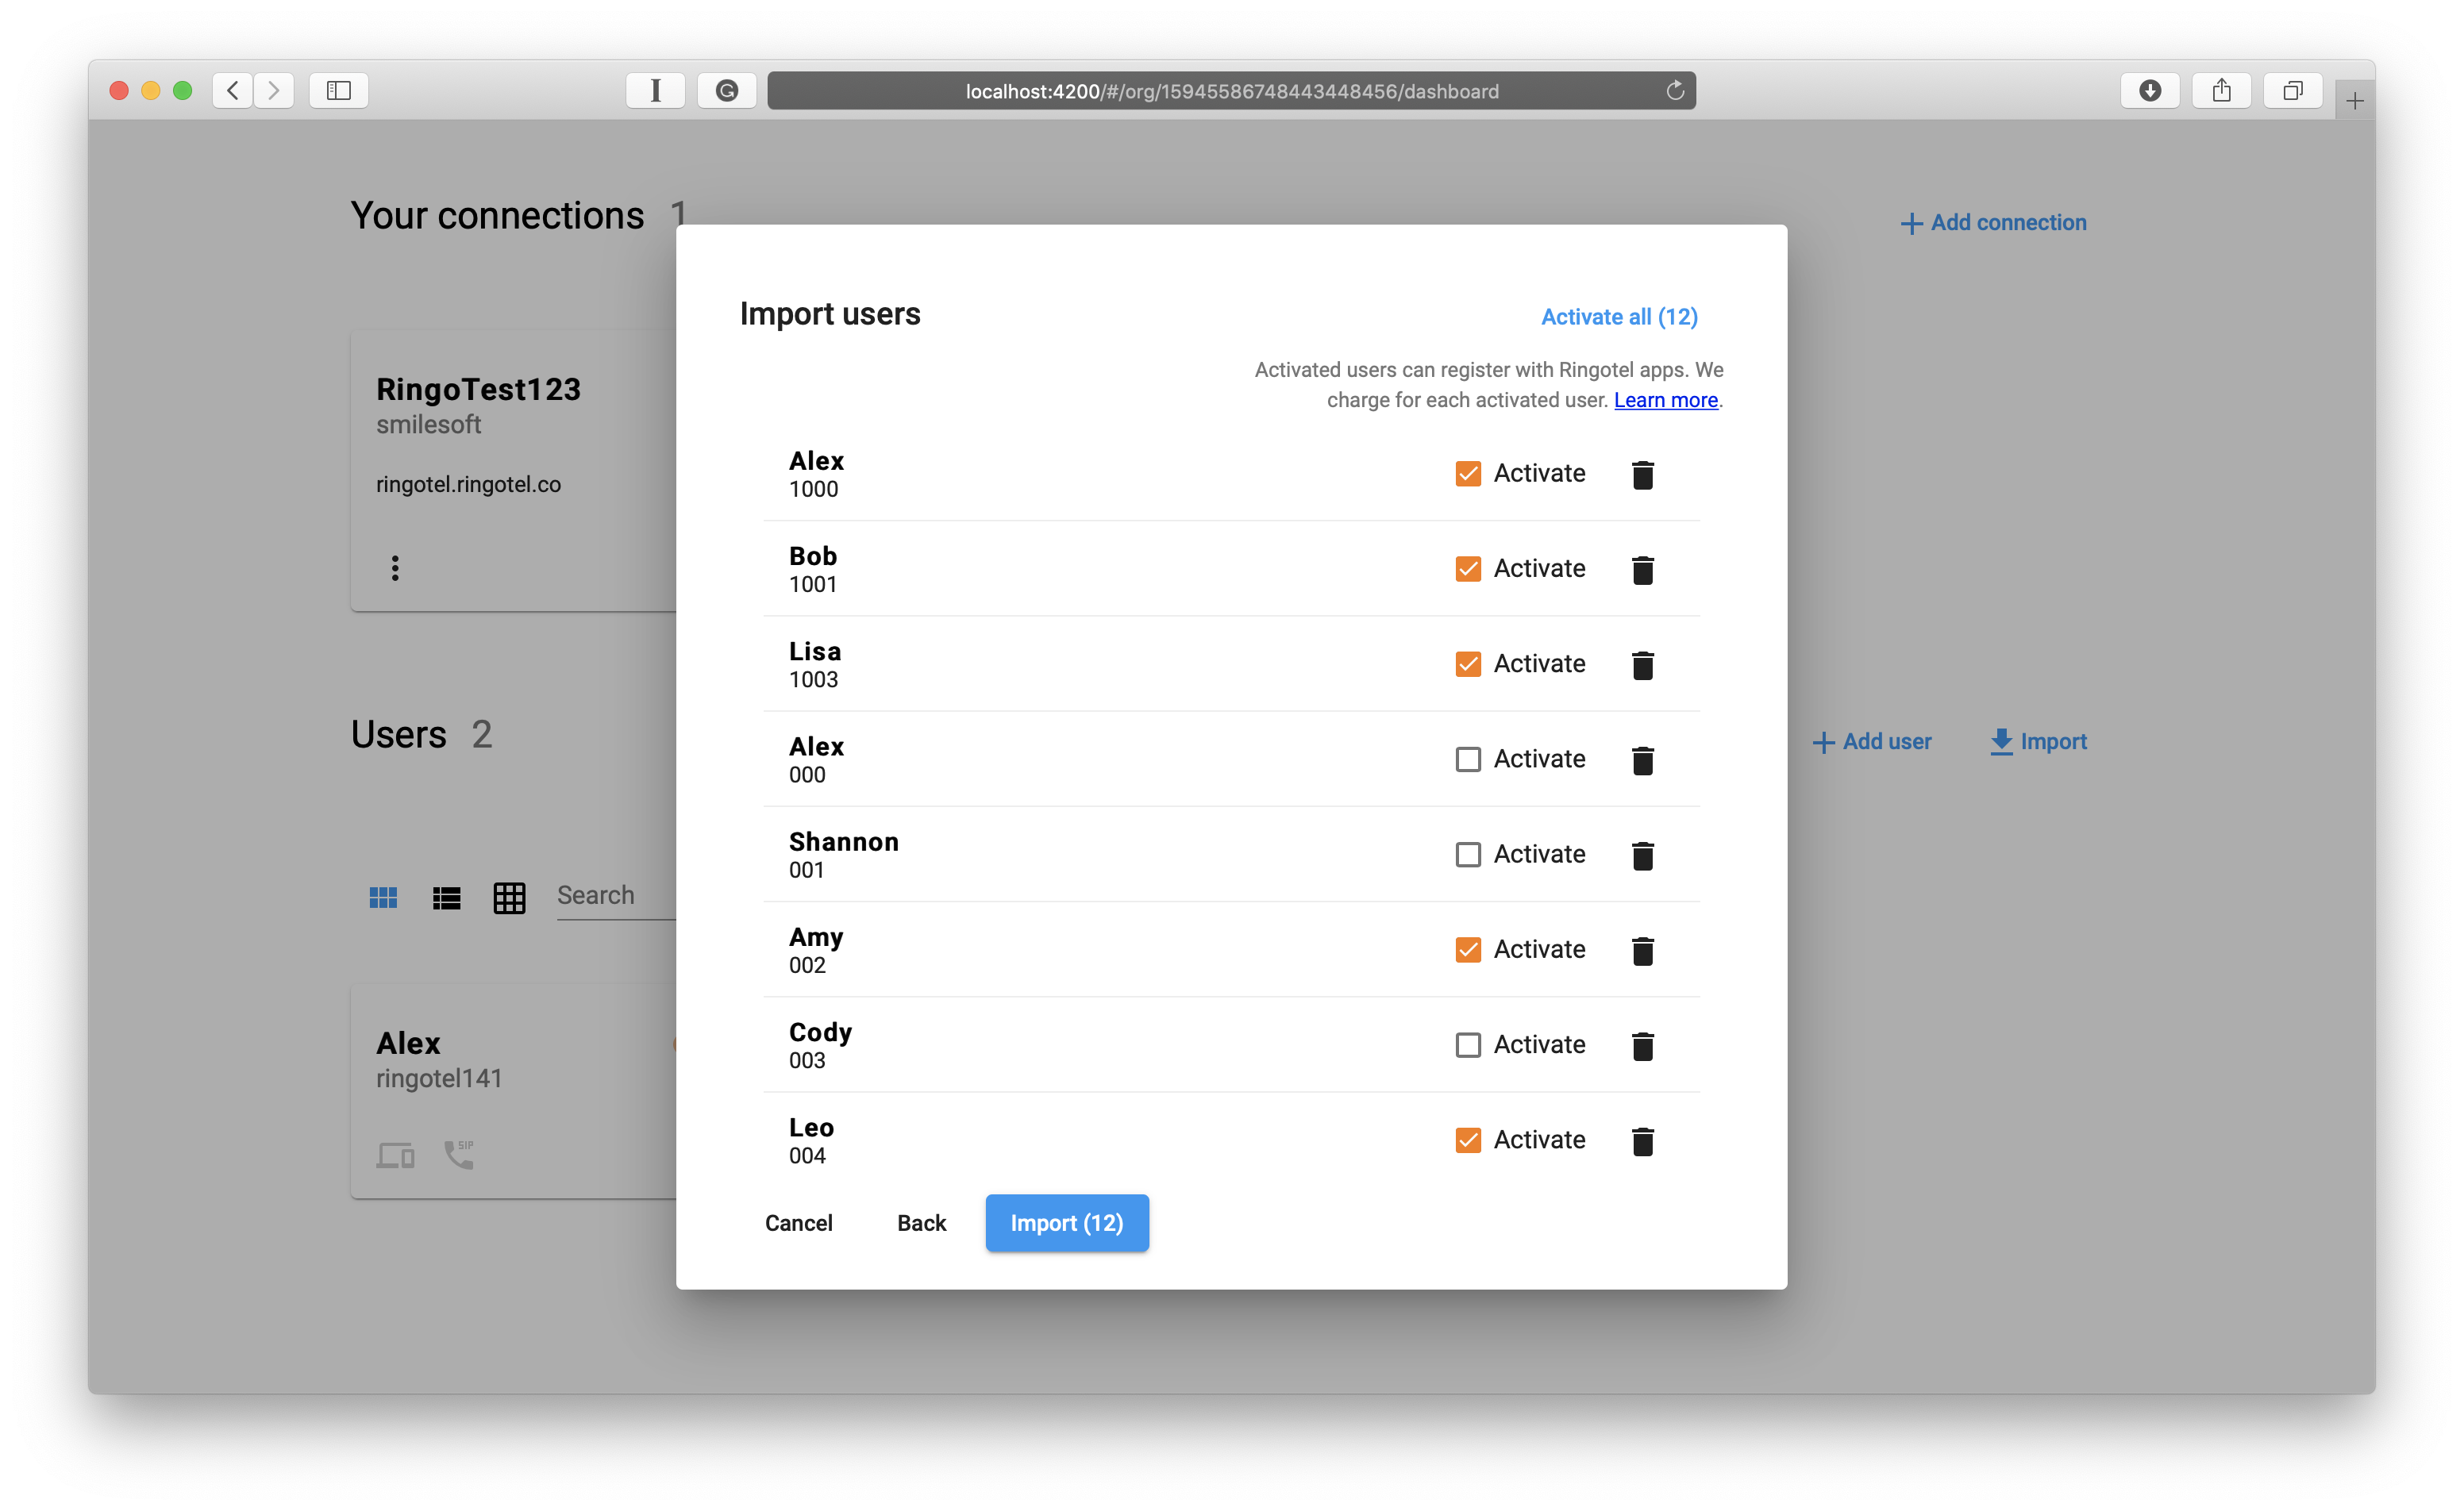
Go the organization or branch dashboard and click Import.
Choose a CSV file in the required format (see Default CSV file format for importing users for details).
Click Next.
In the provided list of users, unselect Activate checkbox for those who need to be created as unactivated users. Use Activate/Deactivate all for quick selection.
When you ready, click Import.
When the users are created, only activated users can then register with Ringotel apps. You can activate a user anytime, by clicking Activate on their record in the admin portal.
Please provide valid SIP credentials before activating users, as they need to be registered on their PBX extensions.